Belt/Disc Sander
 |
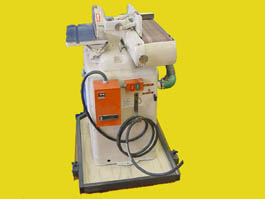
The belt and disc sander are widely used in woodworking. The
disc sander is primarily used for rough shaping, as well as, creating outside
curves, while the belt sander is mainly used to sand the wood or material
being utilized.
This sheet contains methods to properly sand wood in order to create the optimal piece of merchandise that is desired. For other operations, or more in depth procedures for the operation of these handheld tools, please contact the supervisor or refer to one of the many texts available. |
Controls: The few controls that are utilized on this equipment, consist of the following:
- The power supply box
- The electrical cord
- The on/off switch
Procedures Required for Safe Operation of the Sander: Sanding is the process used to abrade the piece of wood that is being worked. The instructions are as follows:
- The switch must be off before the sander is plugged in.
- Keep the electrical cord a safe distance from both you and the ssander.
- The operating controls must be in proper working condition.
- The abrasive paper must not be worn and securely attached to the machine.
- Sanders must be kept clean at all times.
- When not in use, unplug the electrical cord.
- Place the piece of wood on the sander.
- Securely hold your work piece.
- Do not apply a great deal of pressure onto the piece of wood.
- Finally, let the sander do the work.
  |
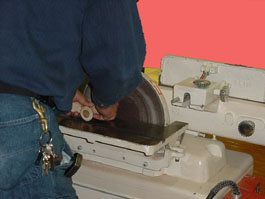
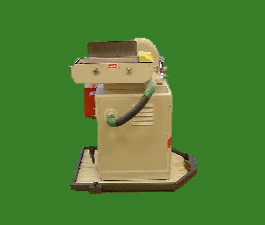
| Always sand the stock on the down- side of the rotational disc to prevent kickbacks. *Note the position of the stock. It is located on the down-side of the rotational disc, where the arrow is pointing. | This is the other side of the belt/disc sander. This flat belt helps you utilize both fence guards to allow your stock to be flat against the abrasive paper. |
Potential Hazards: Due to the rapid rotation of the belts, the following potential hazards pose a risk and should thus be avoided:
- Contact with the moving abrasive belts
- Entanglement (hair, jewelry, clothing, etc...) in the rotating machine parts
- Flying dust
- Slippery floors
- Flying wood pieces
- Faulty wiring
- Worn abrasive paper
- Verify the machine is properly set-up.
- Confirm that all safety equipment is correctly attached to the machine, i.e. guards*.
- Wear the appropriate safety equipment.
- Do not wear any dangling objects or clothing.
- Remove all the sawdust around the belt/disc sander.
- Do not operate if the abrasive paper is loose or torn.
- Unplug the electrical cord when changing the belt.
- The switch must be off before plugging in the cord.
- Keep the cord away form the working area.
- Sand only on the down-side surface of the disc-sander.
- Sand only on dry wood.
- The stock must be positioned against the table at all times.
- Guards: belt sander roll end and side guards.
References:
Spence, William P., Griffiths, Duane L., (1981). Woodworking Tools, Materials. Americcan Technical Publishers, Inc., Alsip, IL.
Feirer, John L. (1988). Cabinetmaking and Millwork. Glencoe/McGraw-Hill. Peoria, IL.
ITT 252 - Materials Processing
Department of Technology
University of Southern Maine
Prepared by Joey Soucy, 9/25/2001