|
|
|
|
|
|
1. PreheatÝ Blue-M Oven to 350oF.
2. Prepare the Plastisol Resin for pouring into the mold. Add pigments, if necessary, and stir thoroughly.
3. Preheat the Slush Cast Mold for approximately 20 minutes.
4. Remove mold from oven (mold is HOT, use thermal gloves).
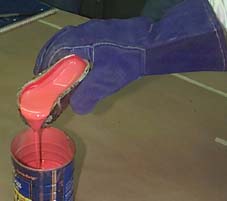
5. Fill mold with the plastisol resin.
6. Set aside for approximately 1-3 minutes allowing the resin to gel or fuse. Periodically tilt the mold, checking to see if desired wall thickness has been achieved.
7. When wall thickness has been achieved, pour the excess resin back into the container.
8. Place mold back into the Blue-M Oven. This will allow the resin to cure fully.
NOTE: Many variables; size of mold, plastisol used, and/or heat source used, can change the time and temperatures used to achieve a full cure. Before starting on final product, a test piece is recommended. Place a half dollar size sample of plastisol on a metal plate. Place sample in oven. Check periodically for signs of a full cure, i.e. a darker, glossier material. Keep record of time. When a full cure is approximated, remove sample and place in cool water. Pull and tear sample; if it rips easy, more time is needed for a full cure; else you should have a full cure and a time to use to cure your final product.
9. Remove mold from oven and allow to cool in water.
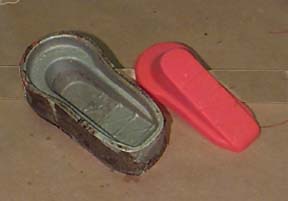
10. Peel finished part from mold and touch up as desired.
1. Review safety instructions dealing with the Blue-M Oven.
2. Wear safety glasses while working in the lab.
3. Wear thermal gloves when working with the Slush Casting Mold.
4. Always pay attention to the process at hand, and always use common sense when working in the lab.