Home
Injection Molding
|
|
There are two injection molders
"Super Hornet" Model 60-PC 100 MINI-JECTOR
and EMCO Model No. 250
Injection Molder both are located in laboratory 109A of the
John Mitchell Center. The parts produced
on injection molders can have complex shapes, surface
textures, variable cross sections, and other
characteristics. The three functional areas of an
injection molder are the injection, mold, and
clamping.
This document describes the operation of
the injection molder and related safety
practices.
|
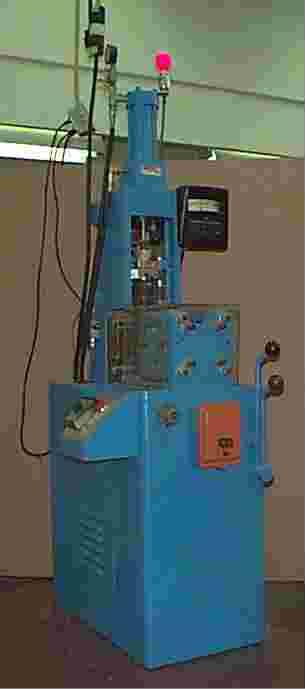
"Super Hornet", Model 60-PC 100,
MINI-JECTOR
Operation: "Super Hornet", Model 60-PC 100,
MINI-JECTOR
1. Turn on the temperature control and allow the machine to
get up to the temperature required for the plastic you are using. A
lot of the plastics used in the lab are molded at about 350 degrees
Fahrenheit.
2. Fill the hopper with the plastic material that is going
to be used.
3. Feed the plastic material into the injection assembly by
pulling forward on the hopper supply knob.
4. Press the start button for the electric motor and
hydraulic pump.
5. Pack material into injection assembly.
a. The top control lever moved to the left lowers
the ram.
b. Move the control lever to the right to retract
the ram.
c. Repeat two or three times feeding material each
time.
6. Allow a minute or two for the material to become fluid.
7. Close the mold by moving the lower control lever to the
left and hold until the mold is completely closed.
Safety Note: Make sure your hands are not in-between the two halves
of the molds. If you do need to put your hand in-between the
molds make sure the the hydraulic system is turned off and the metal
guard bar is hanging between them so that the molds can not
close.
8. To adjust the pressure for injection, loosen the lock nut
on the pressure relief valve.
9. To inject material move the top control lever to the left
and hold with the right hand.
10. When the ram is forward the pressure gauge can be read
(pressure gauge valve must be open). Adjust the pressure relief valve
with the left hand. For more information on the correct
pressure see the instructor or "Regulating the Injection Pressure" in
the instruction manual.
11. Retract the ram and tighten the pressure relief valve
lock nut.
12. Now that the set up process is done you can run the machine to
produce the parts you need. Just make sure there is plastic in the
hopper and you keep packing material into the injection assembly.
Safety:
1. Wear safety glasses while in the lab.
1. Shut off the machine when working on the mold.
2. Electrical work should be done by an electrical
maintenance person.
3. Never allow the ram to remain the injection assembly for long
periods of time.
4. Never shut down the machine with the ram in the injection
assembly.
5. Never leave material in mold; remove molded parts and
sprue before shutting down.
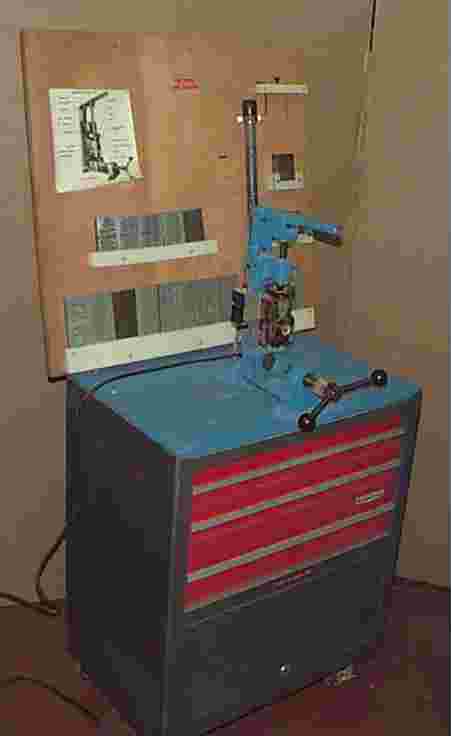
EMCO, Model No. 250, Injection
Molder
Operation: EMCO, Model No. 250, Injection Molder
1. Turn thermostat knob to medium. This will result in a
temperature between 250-300 degrees. Adjust for correct
operating temperature for the plastic to be used.
2. Align the mold in the clamp so that the sprue hole in the
mold is directly under the hole in the nozzle.
3. Clamp mold in place being careful not to over tighten and
that the movement of the clamp does not move sprue hole out of
alignment with the nozzle.
4. Place a small amount of plastic into the opening in the
top of the cylinder with the spoon provided (charging the
cylinder). Allow some heating time so the plastic can melt.
5. Slide the end of the 3/4 inch pipe over the handle. With
one steady deliberate motion press the pipe lever down.
6. Recharge the cylinder before removing the mold. This
allows the shot you just made a few extra seconds to solidify
7. Unclamp and remove the mold from the machine.
Remove the part from the mold, break off the sprue and file any
flashing that may remain.
8. Repeat the cycle for an additional shot.
Safety:
1. Wear safety glasses while in the lab.
2. Be aware of parts or equipment that could be hot.
3. Pay attention to the process at hand.
Prepared by Cory Donovan 3/16/98
References used:
EMCO Instruction
Manual. Educational Machinery Corp. Box 146, Glenville
Sta.-Greenwich, Conn. 06830
Instructions for Operation
of Model "Super Hornet" Model 60-PC 100. (1961, July 1) Newbury
Industries, Inc. Newbury, Ohio
Steele, G.L.(1997).Exploring
the World of Plastics. Illinois: Mcknight Publishing