Oxyacetylene Welding
|
|
Oxyacetylene welding allows metal to be bonded by the application of intense through a neutral gas flame. The gas flame is applied to the metal until it forms a liquid puddle. Once a liquid puddle is formed, it allows both pieces of metal to run or mix together and form a bond. A filler can be used to add to the volume of the liquid puddle. This will add bond strength to the weld. |
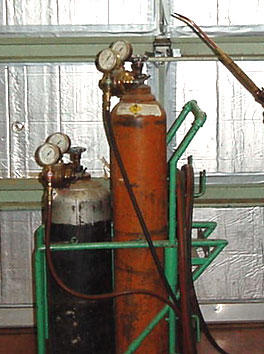
Controls: The controls on the oxyacetylene gas tanks in the materials processing laboratory consist of the following:
- Torch oxygen valve
- Torch acetylene valve
- Acetylene gas tank valve
- Acetylene regulator valve
- Oxygen gas tank valve
- Oxygen regulator valve
Performing
Operations:
1. Getting started.
- Make sure you have the correct torch tip.
- Open the oxygen tank valve all the way
- Open the acetylene tank valve 1/2 turn
- Open the oxygen torch valve 1/2 turn and adjust the oxygen regulator valve to the desired pressure. Close the torch valve.
- Open the acetylene torch valve 1/2 turn and adjust the acetylene regulator valve to the desired pressure. Close the torch valve.
2.Lighting the torch.
- Open the acetylene torch valve 1/8 to 1/4 turn.
- Using a spark lighter, ignite the acetylene gas.
- Open the acetylene torch valve until flame almost seperates from the tip.
- Open the oxygan torch valve until neutral flame is obtained.
|
Tip size # |
|
Metal thickness (inches) |
Filler Rod Dia. (inches) |
|
|
1 |
1 |
1 |
|
|
|
2 |
2 |
2 |
1/32 |
1/16 |
|
3 |
3 |
3 |
1/16 |
1/16 |
|
4 |
4 |
4 |
3/32 |
3/32 |
|
5 |
5 |
5 |
1/8 |
1/8 |
|
6 |
6 |
6 |
3/16 |
1/8 |
|
7 |
7 |
7 |
1/4 |
3/16 |
|
8 |
8 |
8 |
5/16 |
3/16 |
|
9 |
9 |
9 |
3/8 |
3/16 |
|
10 |
10 |
10 |
7/16 |
1/4 |
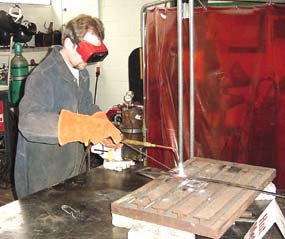
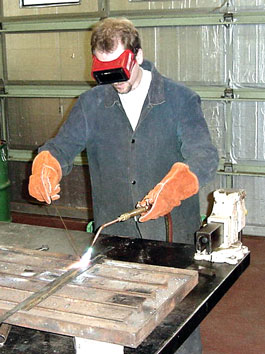
3.Welding Operations:
- Apply heat to the metal while holding the torch at a 30-45 degree angle with the tip pointed in the direction of the joint to be welded.
- Tack weld each end of the seam you wish to weld with the appropriate filler rod.
- Rotate the tip of the torch in small circles along the seam until a puddle forms.
- Once a puddle forms, apply filler rod and move along the seam until a weld is made.
|
|
|
4. Shutting the torch OFF.
- Close the oxygen valve.
- Close the acetylene valve.
- Close both tank valves.
- Drain the oxygen and acetylene lines to the torch.
- Unscrew the regulator valves until there is no pressure on the diaphrams.
- The torch is now completely shut off.
Potential hazards: The following hazards exist:
- Extreme heat
- Burns from the torch and metal.
- Poisoning from the fumes created by inappropriate use.
- Injuries to the eyes by bright light and flying metal particulate.
Safety practices: Because of those potential hazards the following safety rules must be followed:
- Wear the proper protective equipment (Flame proof clothes, Gloves, Goggles and Safety Glasses, Leather Shoes)
- Have a fire extinguisher nearby.
- Weld with proper ventilation.
- Secure work pieces.
- Don't use a cigarette lighter or matches to the torch tip.
- Make sure that the Oxygen and Acetylene tanks are always chained.
References:
Althouse, A.& Turnquist,C.& Boditch, W. (1970). Modern Welding. Goodheart-Wilcox Co. Inc. South Holland, Illinois.
Handout provided by Dr. John Zaner. Materials Processing 252. University of Southern Maine. Faculty of the Department of Technology
ITT 252 - Materials Processing
Department of Technology
University of Southern Maine
Prepared by Timothy Hamilton, 12/16/02